Give CloudFiler permission to connect to Exchange Online
For CloudFiler to access emails on your Exchange Online server, you must first give it specific permissions.
Before you proceed
Microsoft allow businesses to Specify the administrators and users who can install and manage add-ins for Outlook in Exchange Online. If your environment has been limited to specific users you may need to get a colleague who has the required permissions to do the following for you.
Step 1: Register the CloudFiler application |
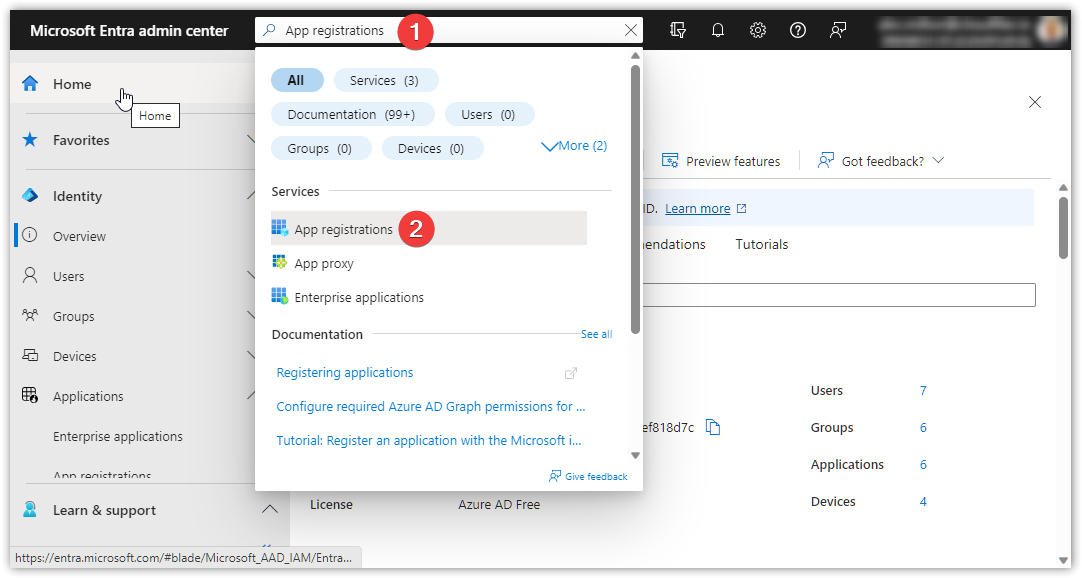
Open the Microsoft 365 admin center portal https://admin.cloud.microsoft/ (Link opens in a new window) In the search field type App registrations and select App registrations
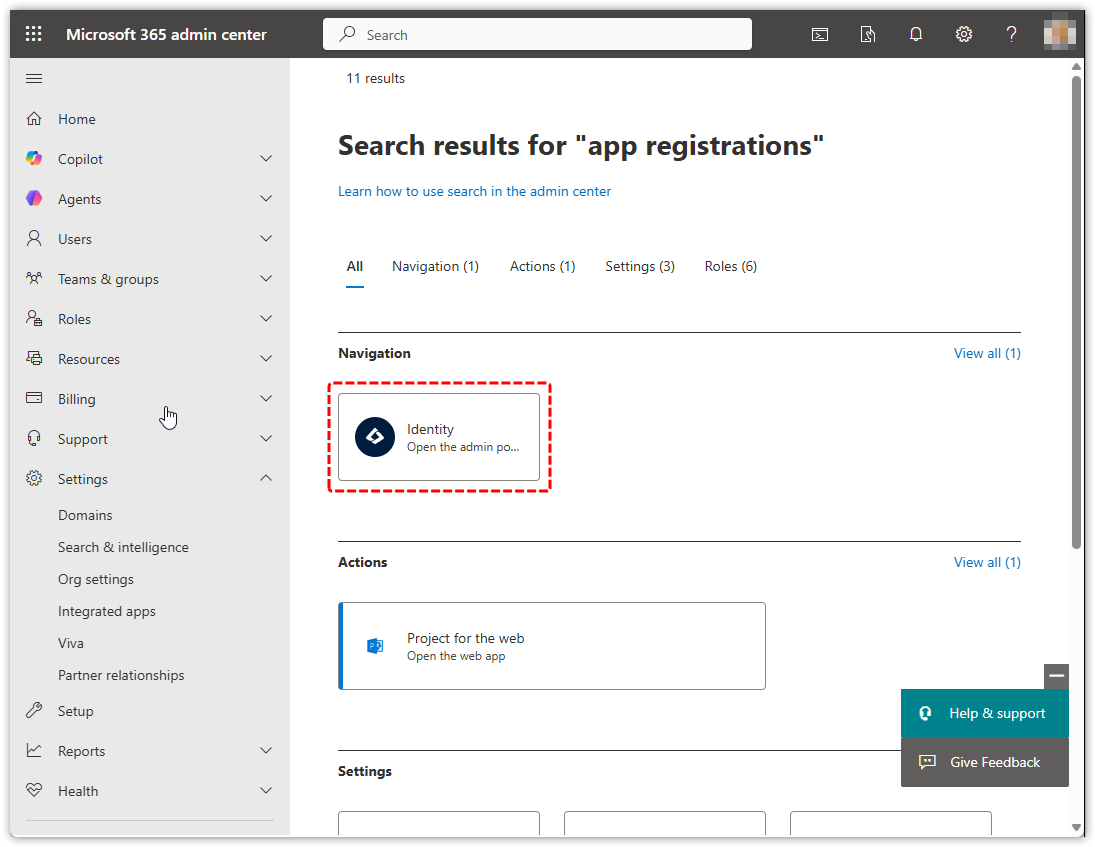
If you are presented with a page like this, select Identity:
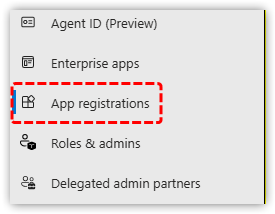
Then select App registrations from the sidebar:
|
||
|
|
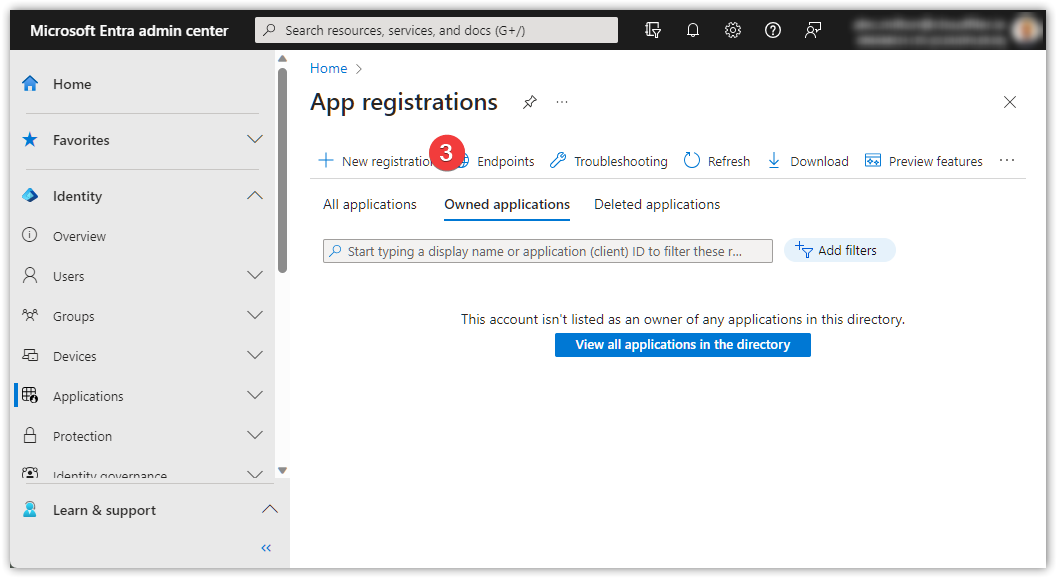
Next select New registration
|
||
|
|
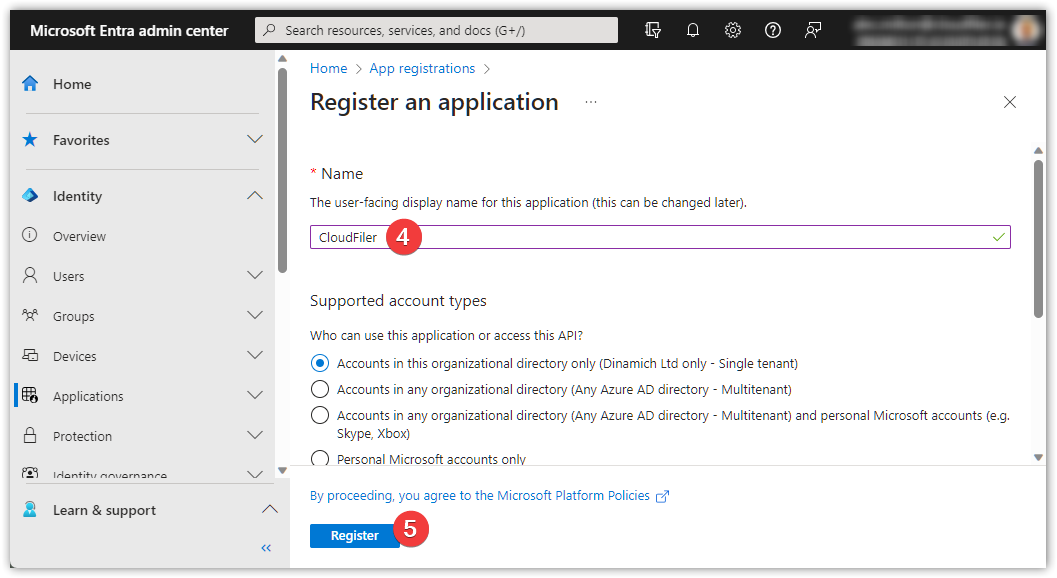
Name it CloudFiler and select Register
|
||
Step 2: Add a certificate |
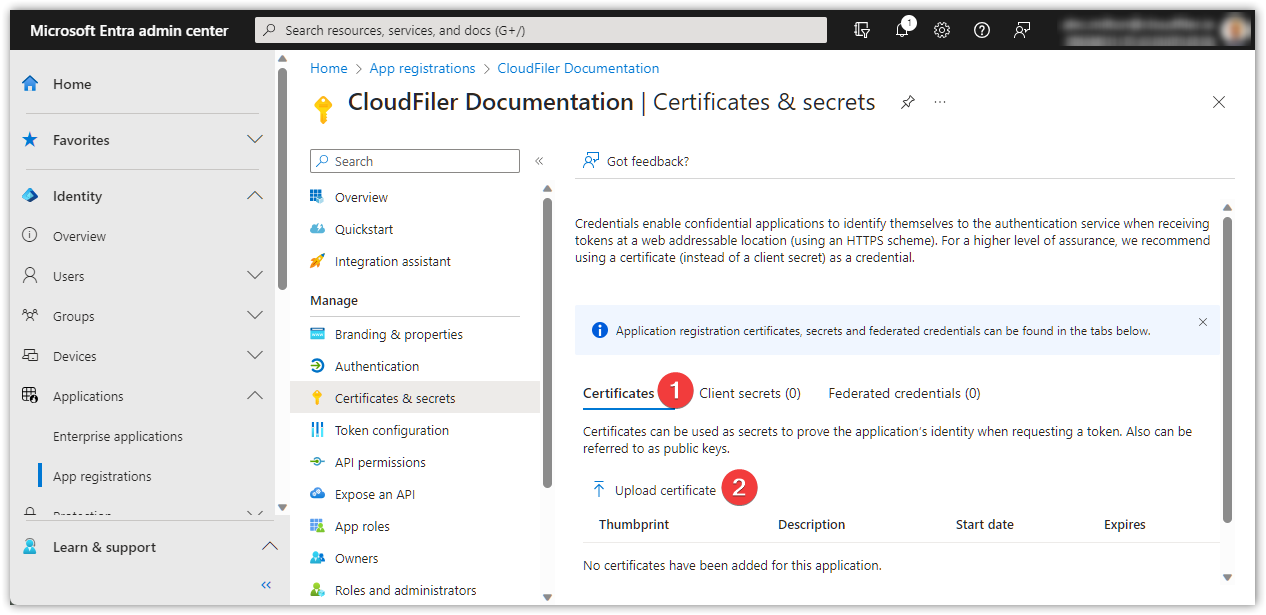
You now need to add a certificate. You will have received an email from us with a link to a web page where you will find the CloudFiler Public Certificate. The file is named cloudfiler-public.crt Download this file. Select Certificates and then Upload certificate
|
||
|
|
|
||
|
|
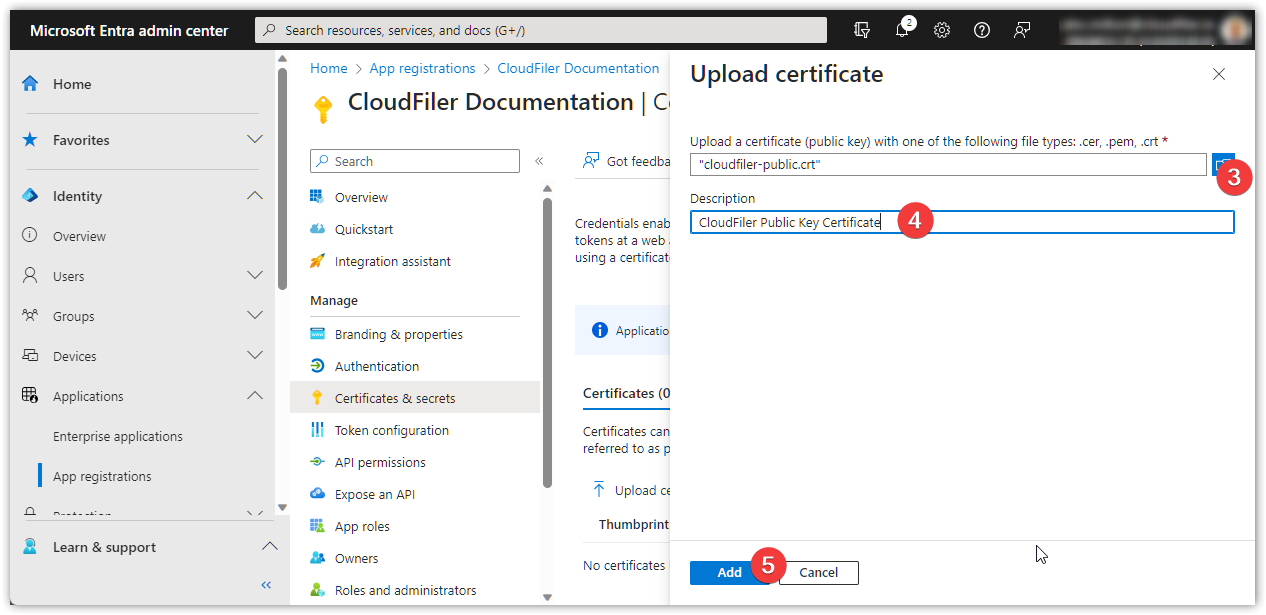
Browse to the downloaded certificate, provide the description CloudFiler Public Key Certificate and then select Add
|
||
Step 3: Assign API permissions |
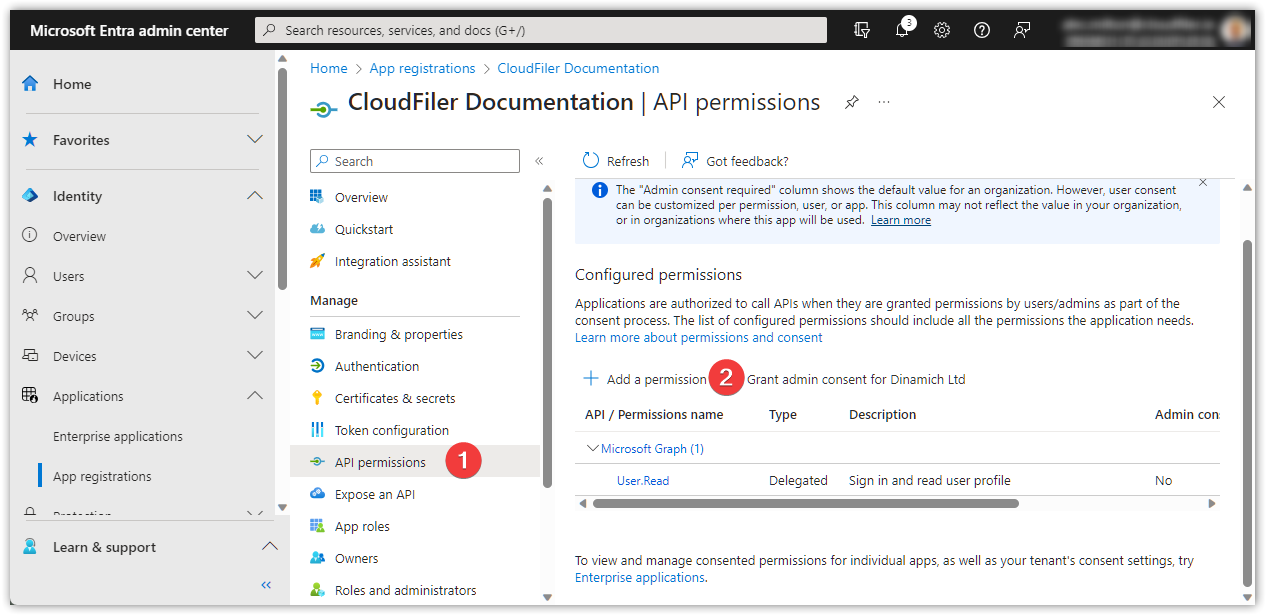
Once the certificate has been added we can assign API permissions by selecting API permissions and then Add a permission:
|
||
|
|
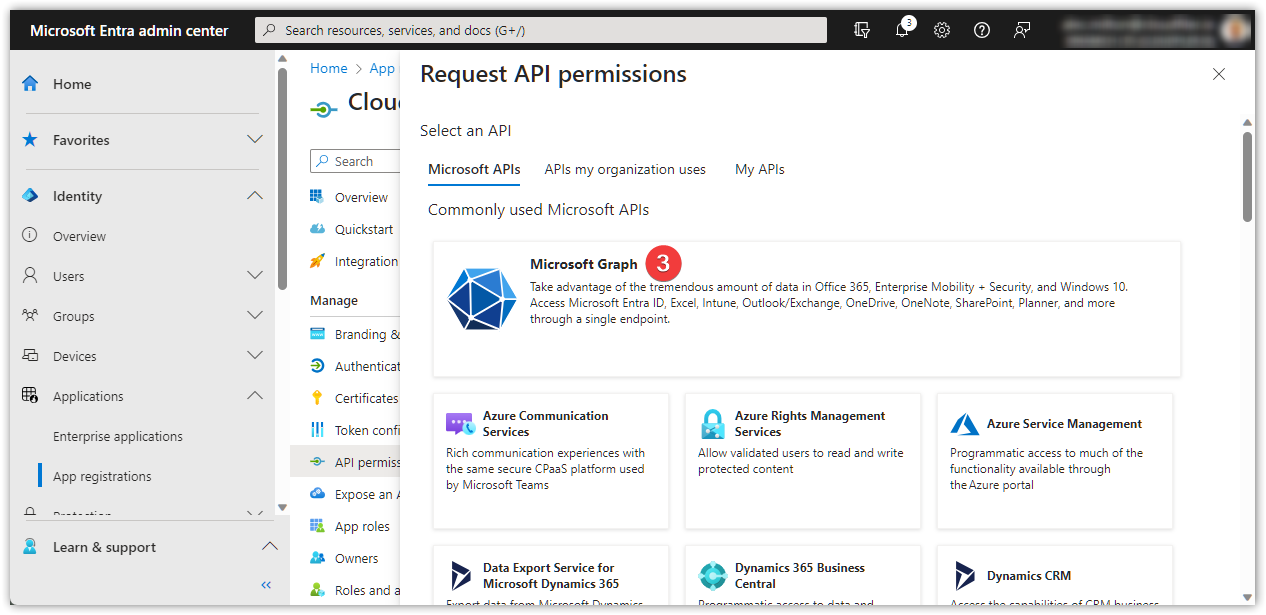
Select Microsoft Graph
|
||
|
|
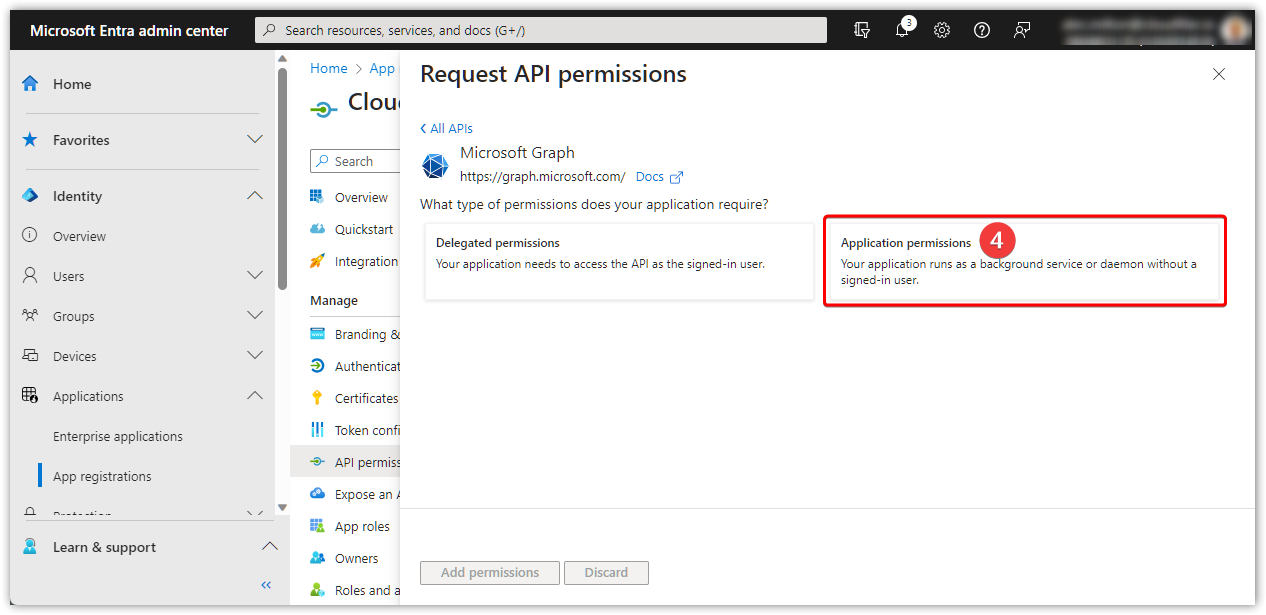
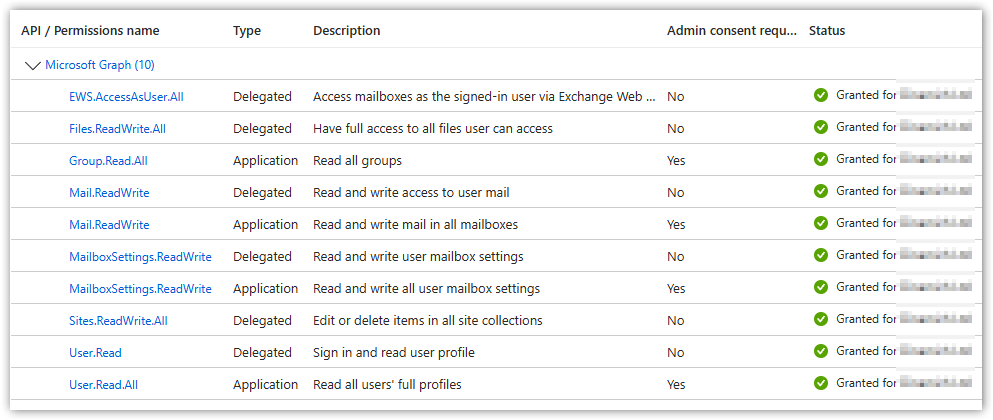
You will see that there are two types of permissions: Delegated and Application. We need to assign both and will start with the Application permissions. Our aim is to first assign the following Application permissions: Mail.ReadWrite Group.Read.All MailboxSettings.ReadWrite User.Read.All We will do the Mail.ReadWrite first, so select Application permissions
|
||
|
|
Filter for Mail.ReadWrite, you may need to expand the filtered sections - in this example its in the Mail section, select Mail.ReadWrite and select Add permissions
Repeat for the remaining three Application permissions listed above. |
||
Step 4: Granting the remaining Graph permissions |
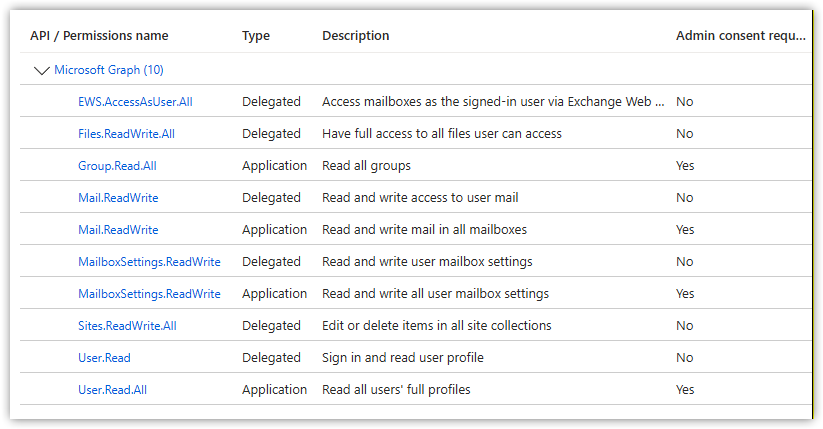
Adding Delegated permissionsWhereas were were adding Application permissions in the previous steps, we now need to add Delegated permissions. The steps are nearly identical: API Permissions | Add a permission | Microsoft Graph | Delegated Permissions | then the required permission So now add the following Delegated Permissions: EWS.AccessAsUser.All Files.ReadWrite.All Mail.ReadWrite MailboxSettings.ReadWrite Sites.ReadWrite.All User.Read If you now select API permissions on the left, your permissions should look like this:
|
||
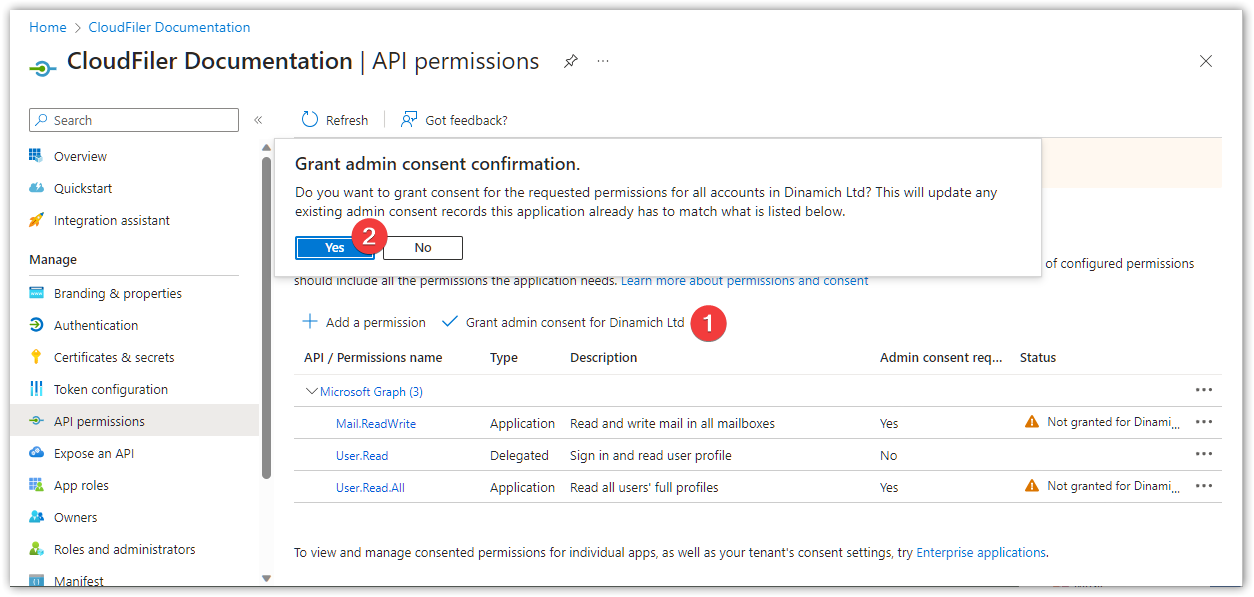
Step 5: Grant consent |
|
||
|
|
|
||
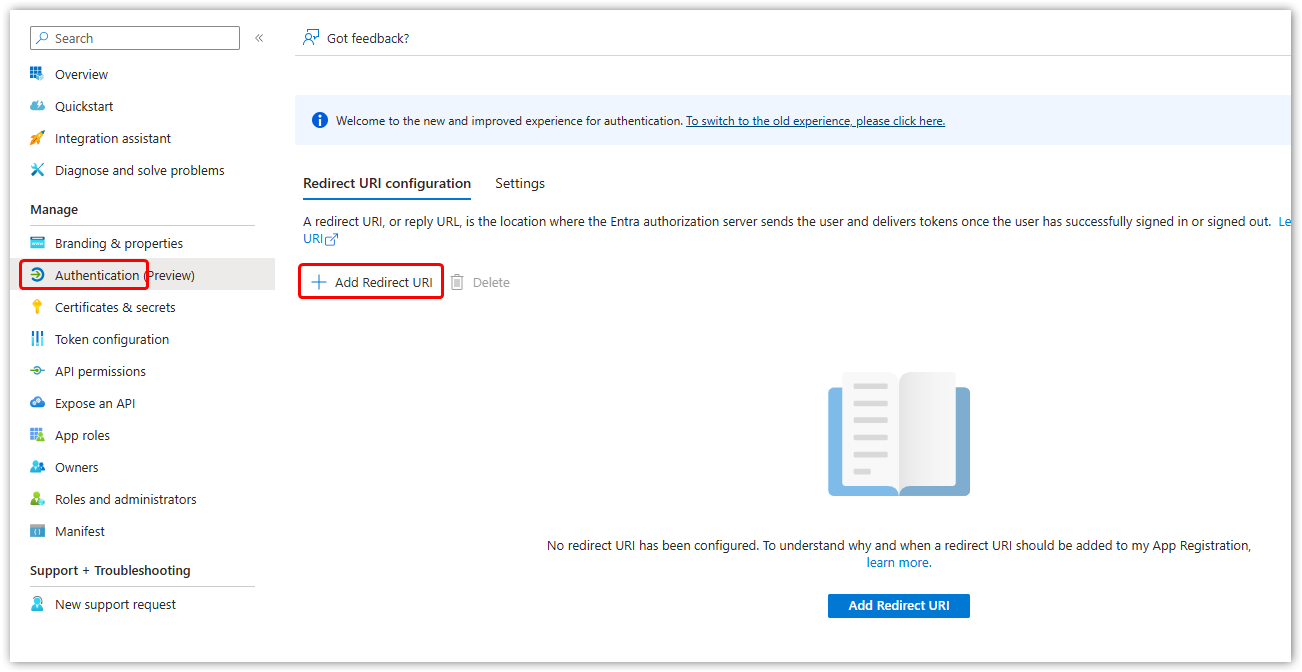
Step 6: Enabling Entra integrated authentication |
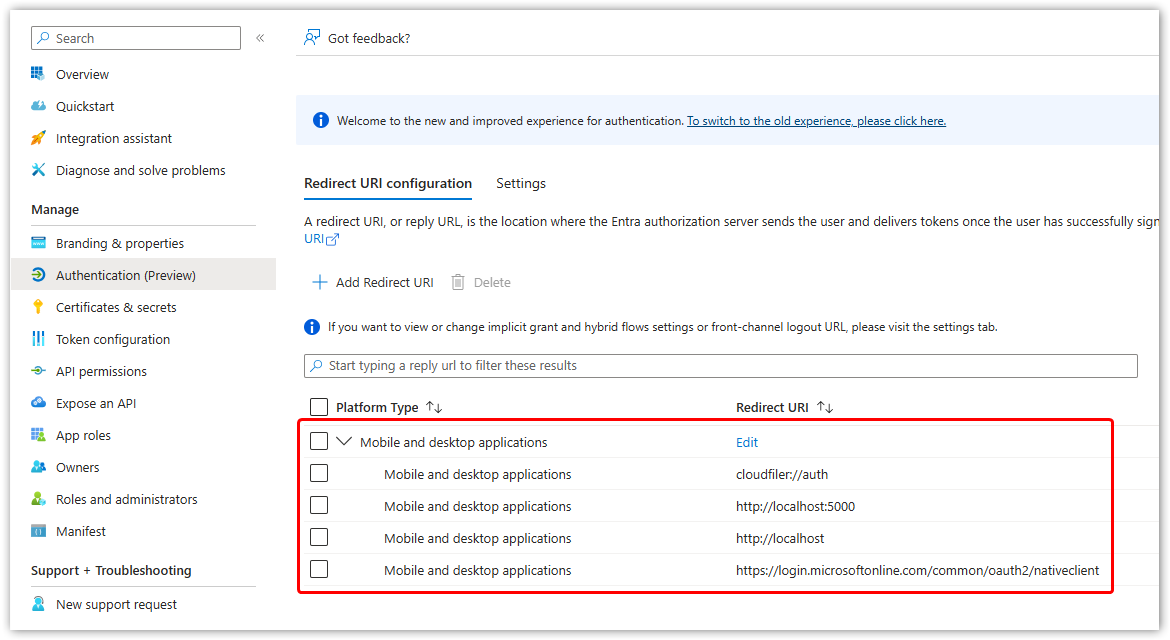
Integrated Authentication SetupYou now need to provide access so that CloudFiler's Hub can manage user authentication. The steps are very similar, so once again take your time and follow them carefully. Pick Authentication and then Add Redirect URI
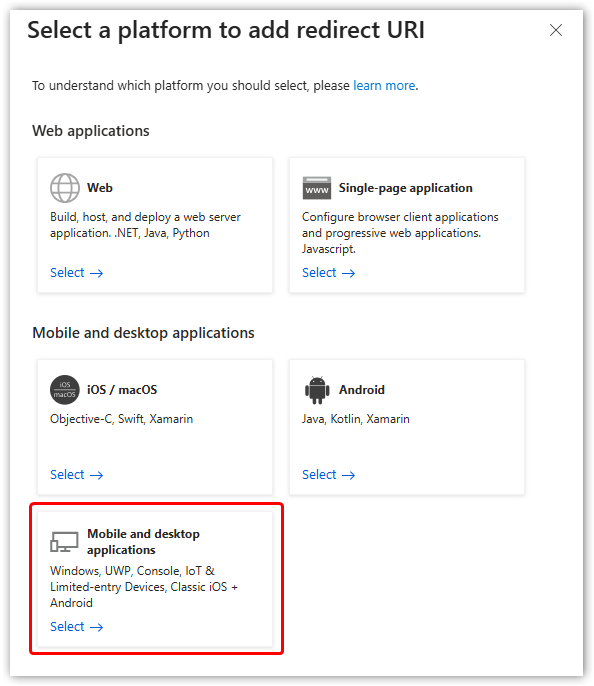
From the side menu select Mobile and desktop applications
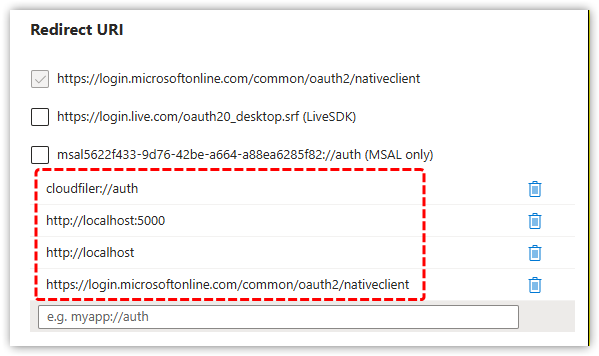
Add the following for Mobile and desktop applications: cloudfiler://auth http://localhost:5000 http://localhost You can add them all at once as it will create a new entry field each time you add one:
Check that they are as shown here, then pick the Configure button. If you have added them correctly they should appear as shown here:
|
||
Step 7: Inform us of the IDs you noted earlier |
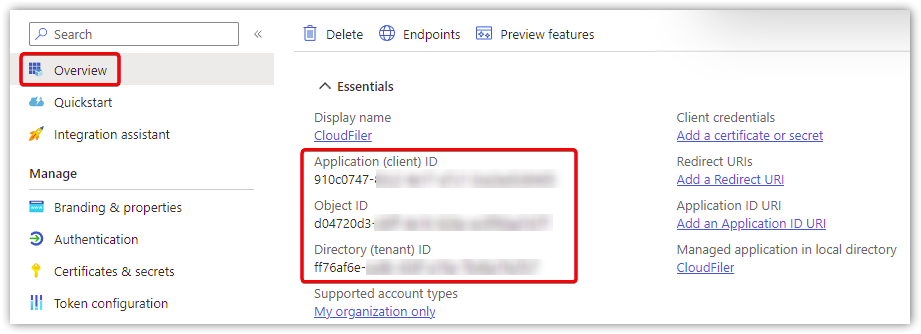
Lastly please email the Application (client) ID, Object ID and Directory (tenant) ID to us. You can find these in the Overview section .
|
||
|
|
Using the 3 IDs that you send us, we will build your tenant. This typically takes around 2 hours. Once your tenant is ready we will email you with some attached files and the next steps. Next step: Present CloudFiler's Manifest file to Exchange Online |