
The first step is to install the Hub and sign in. The Hub deals with the single-sign-on for most of the other CloudFiler Apps and will provide you with access to some of the management tools too (Only Admins will receive these).


For regular users, the Hub provides:

  • Quick access to the search
  • Easy opening of emails via the search 
  • The ability to explore locations via the Add-in


TIP: Mac users should skip this section because the Hub is currently only available as a Windows application


Install the Hub

Go to the Installers page, expand the section for the Hub and download and run the installer


WARNING: Windows is temperamental so if it won’t let you sign in as detailed in the following steps, you may have to log out and back in or even re-boot..


Dock the Hub to your taskbar 

By default Windows will add the icon to the list of hidden items. You can ensure it remains visible on the taskbar by just dragging it onto the chevron and let go:
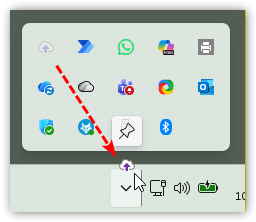


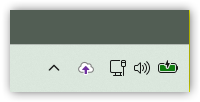
Which will place it in your tray:

Signing in

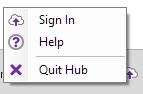
To gain the features of the Hub, you will need to sign in. Right-click it and select Sign In: 


TIP: If users have never signed into Microsoft Office via a browser, they may encounter issues signing into CloudFiler. To ensure that it works first time, users are advised to sign into Outlook.com first. This is a one-time operation, after that signing in and out of CloudFiler should be smooth and simple.


NOTE: Once you have signed in you shouldn’t need to sign in again unless you have manually signed out.


If you encounter difficulties signing in, please follow the advice here.


NOTE: Your colleagues will also need to have the Hub installed if they wish to benefit from its features. One of the last steps in this document covers how you can deploy it to them dormant, so that it can then be enabled by them on the day of the training. Please note that the Hub is only available to those on PCs running Windows.


Next step: Make sure the Add-in is showing and pinned