Securing confidential locations
You should now have the TESTING location along with some others that you have either added or imported. To show you how the security works we will make the TESTING location only visible to IT staff.
- Right-click the Hub’s tray icon and select Portal
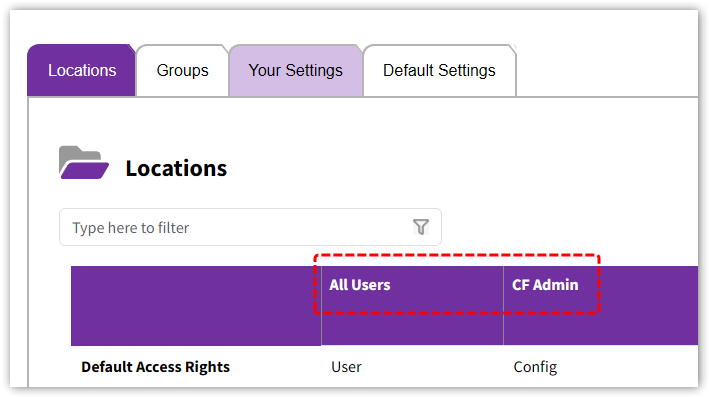
- Select the Locations tab
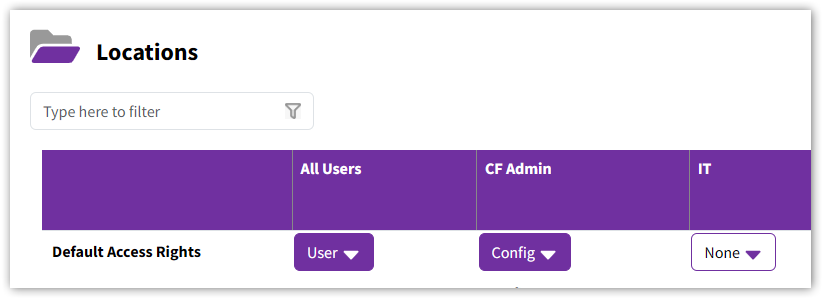
- Note that there are three columns. The first lists the locations. The other two are groups of people. All Users is automatically populated with all your staff. It provides an easy way to either grant or deny access to everyone. CF Admin stands for CloudFiler Administrators – if you have staff who are not Admins but you would like them to be able to edit locations, you can add them to this group
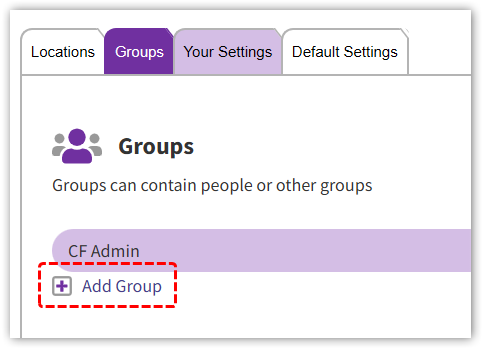
Adding a Group
We want the TESTING location to only be visible to IT staff, so we first need to create a role group named IT and add yourself to it:
- Select the Groups tab and pick Add Group
- Enter the group name IT and pick Add
- Make sure the IT group is selected then click Edit group members and select yourself from the list
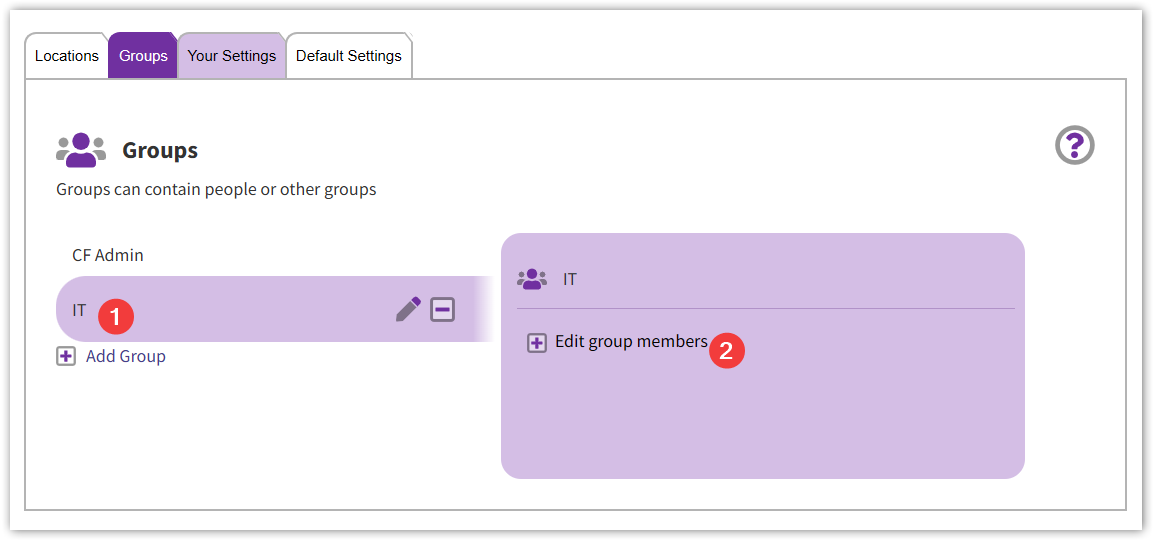
- Click the Locations tab and note that you now have a new column named IT
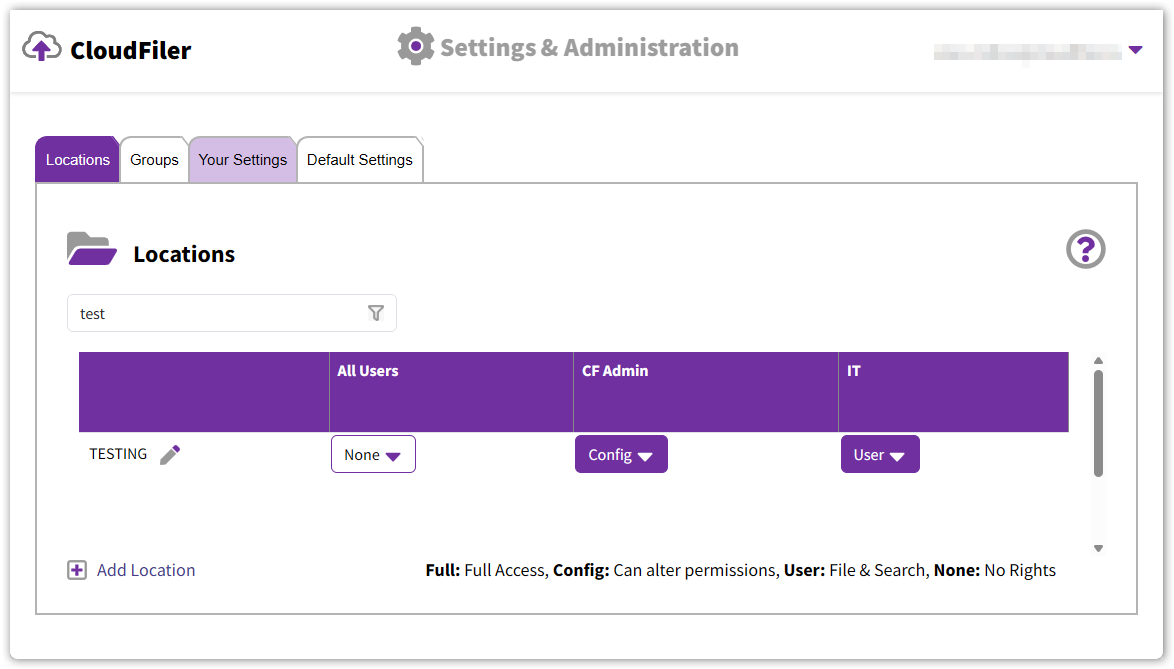
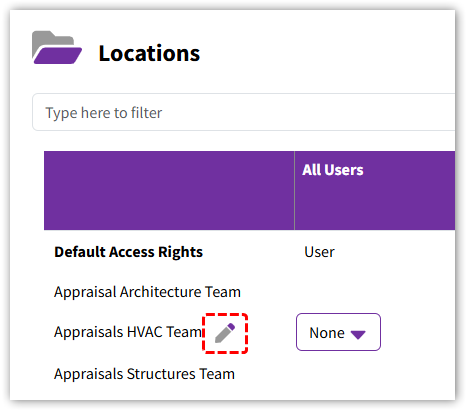
- We want to edit the access permissions to the TESTING location, so if you can’t see the TESTING location, use the filter field to find it
- Notice that when you mouse-over the location name, a pencil icon appears and the options User and Config become combo boxes with four options. This will only happen for Admins and CF Admins and gives you the ability to: edit the location’s name and path via the pencil icon, and change the access rights via the combo boxes
- While you are here, add yourself to the CF Admin group. This will ensure that you will be able to find and edit locations that have been made invisible to everyone
- Golden Rule: if you need to make a location secure, always start by setting its All Users column to None, so do that first
- Leave the CF Admin as Config and change the setting in the IT column to User. It should now look like this:
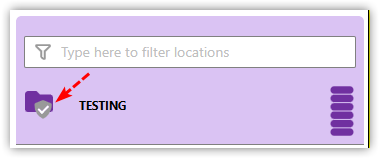
- We can now check whether it is working as expected. So go back to Outlook and in the field at the top of the CloudFiler Add-in, filter for test. You should find that the location is visible to you and its presentation has changed to use the shield icon which indicates that it’s now a restricted access location.
- Check that your colleagues can’t see it
You will have noticed that there are four options, None, User, Config and Full and that there is a key to what they mean in the bottom-right of the form. Our advice is to NEVER use the Full option unless you are absolutely certain you need to, as it gives staff the ability to make changes when you almost certainly don’t want them to.
Default Access Rights
There is a special row named Default Access Rights which always appears at the top of the location list. It determines what permissions are assigned to newly created locations. Typically you will want this set as shown here:
This will make any newly added location available for filing and searching to all staff. Those in the CF Admin group will be able to edit the location when needed. The fact that the IT location is set to None does not mean that the IT are denied access, because they still included in the All Users group, which does have access.
Editing Locations
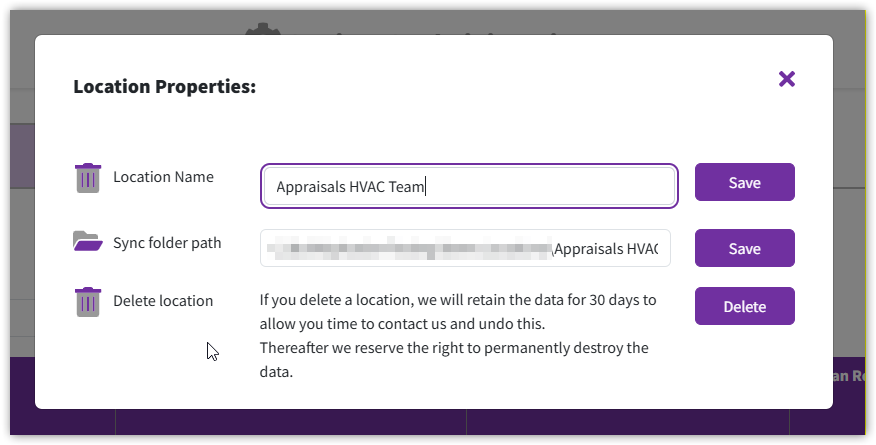
You may at a later date need to edit a location to either change its name or path. To do this, pick its pencil icon:
Then make your changes and pick Save. Note that if you have sufficient rights you will be able to delete locations but that you have 30 days in which to restore them if it was a mistake.

Next step: User Preferences/Settings