Quick Start - for administrators
Once you have completed the steps to Enable CloudFiler on Exchange OnLine and the Add-in has appeared in Outlook, you can proceed to create one or more locations and then test filing and searching.
Create one or more locations
There are four ways that you can create locations:
- Via the web based Portal
- By right-clicking a folder in Windows Explorer if you have installed the Shell Extension
- By importing locations via CloudFiler's Bulk Uploader which you can down load from the Licenses/Tokens/Apps section of the portal
- Use the CloudFiler API (programming interface) to create locations
Use one of the methods above to create one or more locations.
Now file some test messages
Follow the Quick Start for users steps to file both incoming and out-going emails. Then search for them to ensure that you can find the emails that you have just filed.
Syncing emails back to your own storage
If require emails to be synced to own storage, install the File Sync Service then check that the emails you filed earlier have been synced.
You are now ready to go
Your system is now running and you can start to roll it out to staff, however we recommend that you take a moment to consider the following:
- Do you need to test on mobile devices and Outlook Web Access. There is no reason why it should not work on these but if you know that your staff will be using these methods, it would be wise to try them anyway
- Deployment - big bang or gradual roll out? We recommend a gradual roll out for businesses with 20+ staff but each business is different.
What to roll out
If you have followed the steps above the only application you will have installed is the File Sync Service and that will have been on just one machine.
Whilst CloudFiler will work fine, we provide some Apps that make usage more fluid for users. So is is recommended that you consider installing the following:
What do most users typically need installed
Most users need these Apps:
- CloudFiler Prompt To File
- CloudFiler Shell Extension
- CloudFiler Helper
Most users DO NOT need these:
The following are typically only used by one person to migrate legacy data into CloudFiler and are not normally required for all users:
- Bulk Uploader
- Folder Exporter
Each installer explained
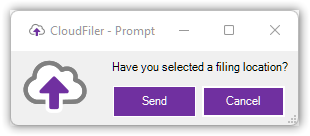
Prompt To File
Pops up this message when sending emails.
NOTE: Be sure to install the version that matches the ‘bitness’ of Outlook and not the 'bitness' of Windows
Help: Prompt to File plug-in
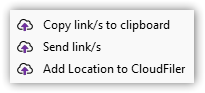
Shell Extension
Provides these right-click options in Windows Explorer
Help: Shell Extension
File Sync Service
Places MSG format copies of the emails in your filing locations.
It should be installed on just one machine and syncs filed emails to your storage. So it should not be installed on each user’s machine
Help: File Sync Service
NOTE: this is only available to Professional and Enterprise licensing tiers.
CloudFiler Helper
When you open an email via the search, the Helper automatically opens it in Outlook desktop for you. If you don't have the App installed, the email is downloaded but not opened.
Help: Helper
Bulk Uploader
Multi-purpose data migration tool. Typically used when importing legacy data.
Help: Bulk Uploader
Folder Exporter
This tool exports emails from Outlook into structured folders and is typically used in conjunction with the Bulk Uploader.
Help: [Awaiting documentation]
WARNING:
There is a known issue that can impact the installation of both the Shell Extension and the File Sync Service as these need a license file.
The issue is that the license file fails to copy to the destination if the file is on a network drive. Thankfully the easy fix is to copy the file to a local folder prior to installation and browse to that copy when prompted for it.